Difference between revisions of "Bedlam Gem Quest"
m (Fixed description at top. Previously said "Sanctuary gem quest") |
|||
| (21 intermediate revisions by one other user not shown) | |||
| Line 1: | Line 1: | ||
| − | This page shows the | + | __TOC__ |
| + | |||
| + | This page shows the Bedlam Gem Quest Monsters and Items. | ||
| + | |||
| + | |||
| + | <font size = 5><span style="color:red">'''Warning:</span>'''</font> '''This dungeon harbors the Flesh Eating Dragon. His bite with Dragon Breath will one shot you almost every time. Over 500 HP is needed to defeat this beast alone and is better to just stealth past him to get to your destination.''' | ||
| + | |||
| + | '''There are also 2 Vrokan Guardians at the entrance right where you port in. They are basically balrons, not too hard to defeat if you are away of them before entering.''' | ||
| + | |||
| + | == Quest Mobs and Items == | ||
| + | |||
| + | === Red Death === | ||
| + | |||
| + | A very easy defeat. They do not hit awfully hard and go down fast. | ||
| + | |||
| + | '''Quest Item: [http://www.uoex.net/wiki/File:Adams_Rib.png Adam's Rib]''' | ||
| − | |||
| − | |||
| − | |||
| − | |||
{| border="6" | {| border="6" | ||
| − | ! | + | !Red Death!!HP!!Phys Resist!!Fire Resist!!Cold Resist!!Poison Resist!!Energy Resist!!Quest Item!!Account Bound |
|- | |- | ||
|[[File:Red Death.png]] | |[[File:Red Death.png]] | ||
| Line 17: | Line 28: | ||
|align="center" "|[[File:Adams Rib.png]] | |align="center" "|[[File:Adams Rib.png]] | ||
|align="center" "|Yes | |align="center" "|Yes | ||
| − | | | + | |} |
| + | |||
| + | === Skeletor === | ||
| + | This creature is pretty easy to defeat. Pets can be a good help for taking this monster down fast as you can instantly re-summon him after each kill. | ||
| + | '''Quest Item: [http://www.uoex.net/wiki/File:Skeleton_Key.png Skeleton Key]''' | ||
| − | |||
| − | |||
| − | |||
| − | |||
{| border="6" | {| border="6" | ||
| − | ! | + | !Skeletor!!HP!!Phys Resist!!Fire Resist!!Cold Resist!!Poison Resist!!Energy Resist!!Quest Item!!Account Bound |
|- | |- | ||
|[[File:Skeletor.png]] | |[[File:Skeletor.png]] | ||
| Line 37: | Line 48: | ||
|align="center" "|[[File:Skeleton Key.png]] | |align="center" "|[[File:Skeleton Key.png]] | ||
|align="center" "|Yes | |align="center" "|Yes | ||
| − | | | + | |} |
| + | |||
| + | === Master Jonath the Tormentor === | ||
| + | |||
| + | Sits on the north end of the Crypt. Not too hard can tank or throw pets on him. Has a bit of HP so might be time consuming. | ||
| + | '''Quest Item: [http://www.uoex.net/wiki/File:Jonath's_Mask.png Jonath's Mask]''' | ||
| − | |||
| − | |||
| − | |||
| − | |||
{| border="6" | {| border="6" | ||
| − | ! | + | !Master Jonath!!HP!!Phys Resist!!Fire Resist!!Cold Resist!!Poison Resist!!Energy Resist!!Quest Item!!Account Bound |
|- | |- | ||
|[[File:Jonath.png]] | |[[File:Jonath.png]] | ||
| Line 57: | Line 69: | ||
|align="center" "|[[File:Jonath's Mask.png]] | |align="center" "|[[File:Jonath's Mask.png]] | ||
|align="center" "|Yes | |align="center" "|Yes | ||
| − | | | + | |} |
| + | |||
| + | === Lord Malachai, Ruler of the Vroakan Order === | ||
| + | |||
| + | Another boss that has a bit of hp, but is not too hard to defeat. Tanking and/or pets both work well. | ||
| + | '''Quest Item: [http://www.uoex.net/wiki/File:Jade_Amulet.png Jade Amulet]''' | ||
| − | |||
| − | |||
| − | |||
| − | |||
{| border="6" | {| border="6" | ||
| − | ! | + | !Lord Malachai!!HP!!Phys Resist!!Fire Resist!!Cold Resist!!Poison Resist!!Energy Resist!!Quest Item!!Account Bound |
|- | |- | ||
|[[File:Malachai.png]] | |[[File:Malachai.png]] | ||
| Line 76: | Line 89: | ||
|align="center" "|[[File:Jade Amulet.png]] | |align="center" "|[[File:Jade Amulet.png]] | ||
|align="center" "|Yes | |align="center" "|Yes | ||
| − | | | + | |} |
| + | |||
| + | === Monstrous Interred Grizzle === | ||
| + | |||
| + | The Monstrous Interred Grizzle can be a hard fight. He does an 8 tile Life Leech, Whirlwinds your pets, and Mortal Strikes at times. Cu Sidhes and imps with good healing work well on this monster. Also higher HP tanking is effective as well. | ||
| + | '''Quest Item: [http://www.uoex.net/wiki/File:Grizzled_Bones.png Grizzled Bones]''' | ||
| − | |||
| − | |||
| − | |||
| − | |||
{| border="6" | {| border="6" | ||
| − | ! | + | !Monstrous Interred Grizzle!!HP!!Phys Resist!!Fire Resist!!Cold Resist!!Poison Resist!!Energy Resist!!Quest Item!!Account Bound |
|- | |- | ||
|[[File:Grizzle.png]] | |[[File:Grizzle.png]] | ||
| Line 95: | Line 109: | ||
|align="center" "|[[File:Grizzled Bones.png]] | |align="center" "|[[File:Grizzled Bones.png]] | ||
|align="center" "|Yes | |align="center" "|Yes | ||
| − | | | + | |} |
| − | + | [[Bedlam Gem Quest#Top | Return To Top]] | |
== Entering The Crypt == | == Entering The Crypt == | ||
| + | |||
| + | |||
The [http://www.uoex.net/wiki/File:Crypt.png Crypt] harbors 3 enemies which carry items for completion, and one item for passage to the Monstrous Interred Grizzle. | The [http://www.uoex.net/wiki/File:Crypt.png Crypt] harbors 3 enemies which carry items for completion, and one item for passage to the Monstrous Interred Grizzle. | ||
In order to get into the Crypt we need the [http://www.uoex.net/wiki/File:Crypt_Key.png Crypt Key] The crypt key can be obtained by defeating the Ancient Mage Mikael. | In order to get into the Crypt we need the [http://www.uoex.net/wiki/File:Crypt_Key.png Crypt Key] The crypt key can be obtained by defeating the Ancient Mage Mikael. | ||
| − | + | ||
| − | + | ||
| − | + | === Ancient Mage Mikael === | |
| − | + | ||
| + | This Mage is not too hard to defeat. He is basically an ancient lich lord with more HP/Str. | ||
| + | |||
| + | '''Item Obtained: [http://www.uoex.net/wiki/File:Crypt_Key.png Crypt Key]''' | ||
| + | |||
{| border="6" | {| border="6" | ||
| − | ! | + | !Ancient Mage Mikael!!HP!!Phys Resist!!Fire Resist!!Cold Resist!!Poison Resist!!Energy Resist!!Quest Item!!Account Bound |
|- | |- | ||
|[[File:Ancient Mage Mikael.png]] | |[[File:Ancient Mage Mikael.png]] | ||
| Line 120: | Line 140: | ||
|align="center" "|[[File:Crypt Key.png]] | |align="center" "|[[File:Crypt Key.png]] | ||
|align="center" "|Decays | |align="center" "|Decays | ||
| − | | | + | |} |
| + | |||
| + | [[Bedlam Gem Quest#Top | Return To Top]] | ||
| − | |||
== Password For Entry == | == Password For Entry == | ||
| Line 128: | Line 149: | ||
In order to get to the Monstrous Interred Grizzle, you will need to find the password. This quest is only needed once since the password never changes. To get the password you must kill Master Theophilus, who resides on the south end inside the Crypt. The password will be written in the book of secrets, which will be on the corpse of Theophilus. | In order to get to the Monstrous Interred Grizzle, you will need to find the password. This quest is only needed once since the password never changes. To get the password you must kill Master Theophilus, who resides on the south end inside the Crypt. The password will be written in the book of secrets, which will be on the corpse of Theophilus. | ||
| − | + | === Master Theophilus === | |
| − | + | ||
| − | + | Master Theophilus is an easy guy to defeat. It does take awhile to do with his hp being high. Tanking and/or Pets should do the trick with ease. | |
| − | + | ||
| + | '''Item Obtained: [http://www.uoex.net/wiki/File:Book_of_Secrets.png Book of Secrets]''' | ||
| + | |||
{| border="6" | {| border="6" | ||
| − | ! | + | !Master Theophilus!!HP!!Phys Resist!!Fire Resist!!Cold Resist!!Poison Resist!!Energy Resist!!Quest Item!!Account Bound |
|- | |- | ||
|[[File:Theophilus.png]] | |[[File:Theophilus.png]] | ||
| Line 144: | Line 167: | ||
|align="center" "|[[File:Book of Secrets.png]] | |align="center" "|[[File:Book of Secrets.png]] | ||
|align="center" "|Decays | |align="center" "|Decays | ||
| − | | | + | |} |
| + | [[Bedlam Gem Quest#Top | Return To Top]] | ||
| − | |||
== Summoning Skeletor == | == Summoning Skeletor == | ||
| Line 153: | Line 176: | ||
[[File:Skeletor Lever.png]] | [[File:Skeletor Lever.png]] | ||
| + | |||
| + | [[Bedlam Gem Quest#Top | Return To Top]] | ||
| + | |||
| + | |||
| + | == Dungeon Maps == | ||
| + | |||
| + | |||
| + | === Level 1 === | ||
| + | |||
| + | [[File:Bedlam_Level_1.png]] | ||
| + | |||
| + | === Level 2 === | ||
| + | |||
| + | [[File:Bedlam Level 2 Map.png]] | ||
| + | |||
| + | |||
| + | [[Bedlam Gem Quest#Top | Return To Top]] | ||
Latest revision as of 17:29, 4 June 2015
Contents
This page shows the Bedlam Gem Quest Monsters and Items.
Warning: This dungeon harbors the Flesh Eating Dragon. His bite with Dragon Breath will one shot you almost every time. Over 500 HP is needed to defeat this beast alone and is better to just stealth past him to get to your destination.
There are also 2 Vrokan Guardians at the entrance right where you port in. They are basically balrons, not too hard to defeat if you are away of them before entering.
Quest Mobs and Items
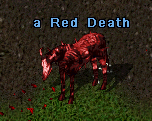
Red Death
A very easy defeat. They do not hit awfully hard and go down fast.
Quest Item: Adam's Rib
| Red Death | HP | Phys Resist | Fire Resist | Cold Resist | Poison Resist | Energy Resist | Quest Item | Account Bound |
|---|---|---|---|---|---|---|---|---|
|
1535 HP | 62% | 90% | 0 | 100% | 0 | Yes |
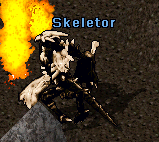
Skeletor
This creature is pretty easy to defeat. Pets can be a good help for taking this monster down fast as you can instantly re-summon him after each kill.
Quest Item: Skeleton Key
| Skeletor | HP | Phys Resist | Fire Resist | Cold Resist | Poison Resist | Energy Resist | Quest Item | Account Bound |
|---|---|---|---|---|---|---|---|---|
|
3600 HP | 75% | 60% | 90% | 100% | 60% | Yes |
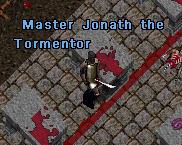
Master Jonath the Tormentor
Sits on the north end of the Crypt. Not too hard can tank or throw pets on him. Has a bit of HP so might be time consuming.
Quest Item: Jonath's Mask
| Master Jonath | HP | Phys Resist | Fire Resist | Cold Resist | Poison Resist | Energy Resist | Quest Item | Account Bound |
|---|---|---|---|---|---|---|---|---|
|
????? | ? | ? | ? | ? | ? | Yes |
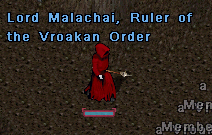
Lord Malachai, Ruler of the Vroakan Order
Another boss that has a bit of hp, but is not too hard to defeat. Tanking and/or pets both work well.
Quest Item: Jade Amulet
| Lord Malachai | HP | Phys Resist | Fire Resist | Cold Resist | Poison Resist | Energy Resist | Quest Item | Account Bound |
|---|---|---|---|---|---|---|---|---|
|
????? | ? | ? | ? | ? | ? | Yes |
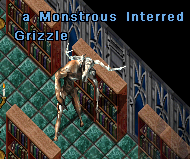
Monstrous Interred Grizzle
The Monstrous Interred Grizzle can be a hard fight. He does an 8 tile Life Leech, Whirlwinds your pets, and Mortal Strikes at times. Cu Sidhes and imps with good healing work well on this monster. Also higher HP tanking is effective as well.
Quest Item: Grizzled Bones
| Monstrous Interred Grizzle | HP | Phys Resist | Fire Resist | Cold Resist | Poison Resist | Energy Resist | Quest Item | Account Bound |
|---|---|---|---|---|---|---|---|---|
|
15211 HP | 82% | 72% | 75% | 64% | 70% | Yes |
Entering The Crypt
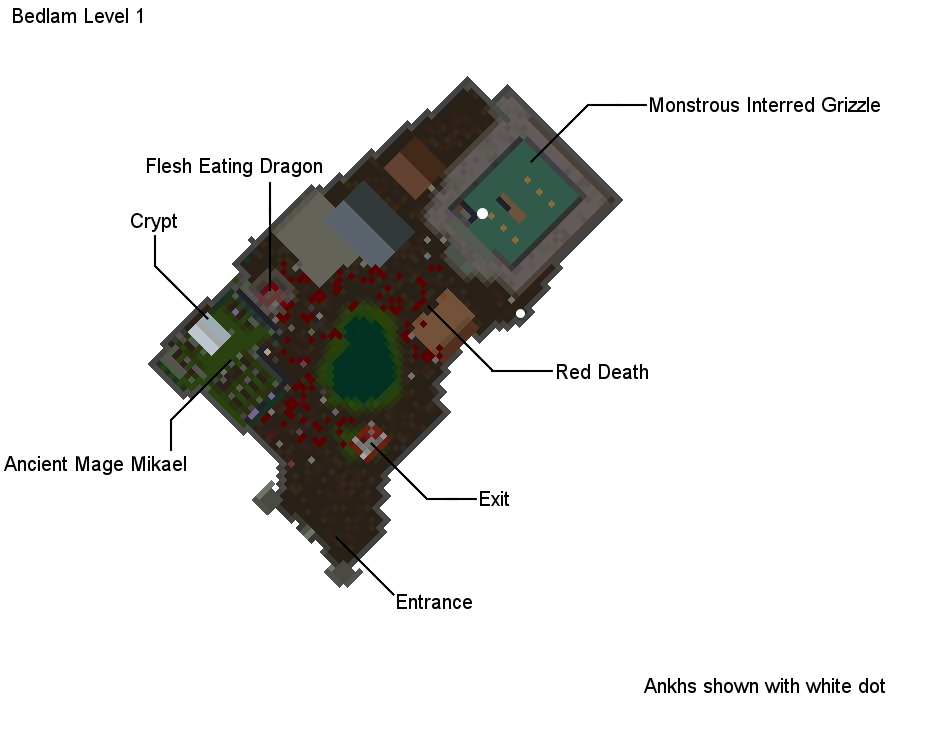
The Crypt harbors 3 enemies which carry items for completion, and one item for passage to the Monstrous Interred Grizzle. In order to get into the Crypt we need the Crypt Key The crypt key can be obtained by defeating the Ancient Mage Mikael.
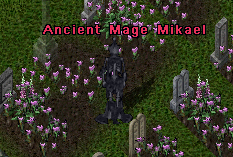
Ancient Mage Mikael
This Mage is not too hard to defeat. He is basically an ancient lich lord with more HP/Str.
Item Obtained: Crypt Key
| Ancient Mage Mikael | HP | Phys Resist | Fire Resist | Cold Resist | Poison Resist | Energy Resist | Quest Item | Account Bound |
|---|---|---|---|---|---|---|---|---|
|
12112 | 56% | 48% | 79% | 43% | 57% | Decays |
Password For Entry
In order to get to the Monstrous Interred Grizzle, you will need to find the password. This quest is only needed once since the password never changes. To get the password you must kill Master Theophilus, who resides on the south end inside the Crypt. The password will be written in the book of secrets, which will be on the corpse of Theophilus.
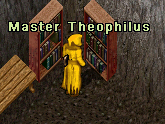
Master Theophilus
Master Theophilus is an easy guy to defeat. It does take awhile to do with his hp being high. Tanking and/or Pets should do the trick with ease.
Item Obtained: Book of Secrets
| Master Theophilus | HP | Phys Resist | Fire Resist | Cold Resist | Poison Resist | Energy Resist | Quest Item | Account Bound |
|---|---|---|---|---|---|---|---|---|
|
????? | ? | ? | ? | ? | ? | Decays |
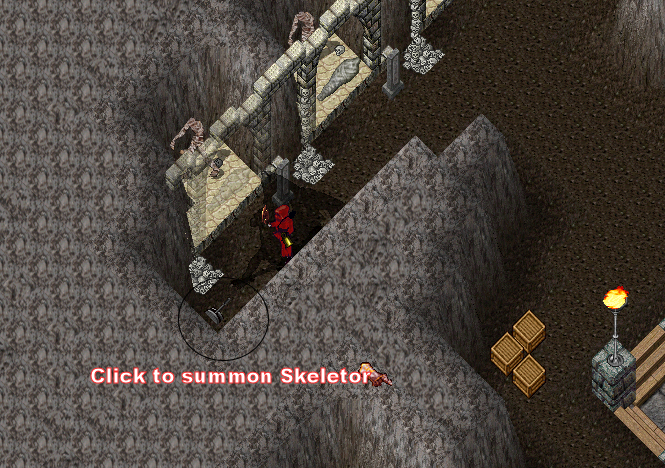
Summoning Skeletor
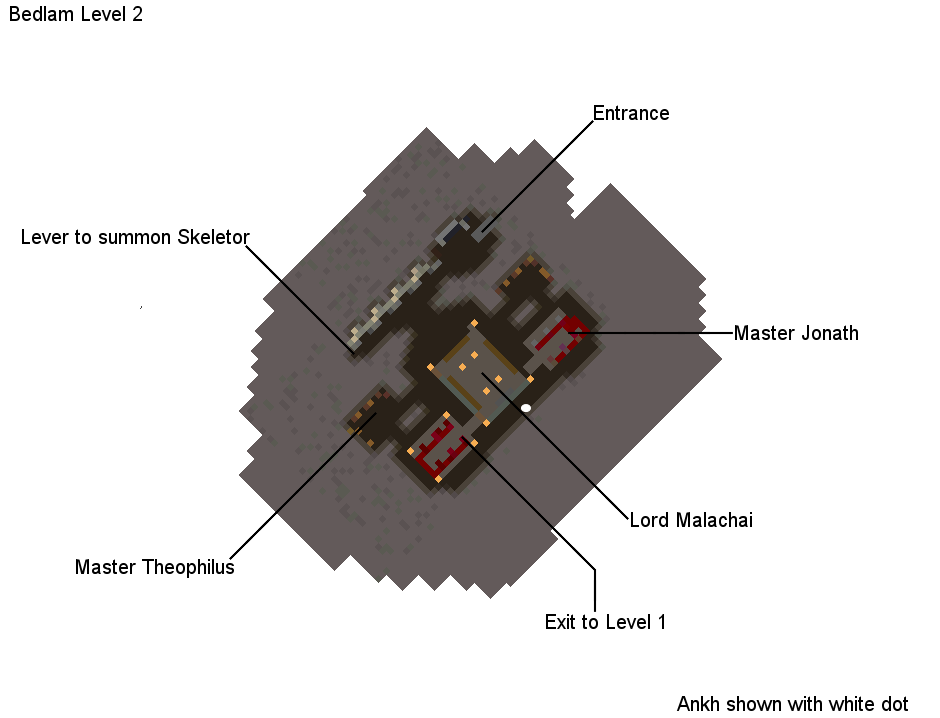
In order to summon Skeletor you must flip the lever on the South end of the West wall. Pictured Below:
