Difference between revisions of "Palace of Paroxysmus Gem Quest"
(Created page with "This page shows the Palace of Paroxysmus Gem Quest Monsters and Items. {| | '''Putrid Waste:''' | style="padding-left: 5em" |'''Quest Item: [http://www.uoex.net/wiki/File:Smelly...") |
(→Putrifier) |
||
| (19 intermediate revisions by the same user not shown) | |||
| Line 1: | Line 1: | ||
| + | __TOC__ | ||
| + | |||
| + | |||
| + | == Quest Mobs and Items == | ||
| + | |||
This page shows the Palace of Paroxysmus Gem Quest Monsters and Items. | This page shows the Palace of Paroxysmus Gem Quest Monsters and Items. | ||
| − | + | === Toxic Experiment === | |
| − | + | ||
| − | + | The Toxic Experiments spawn all over the dungeon. They hit pretty hard and can easily down a person and their pets. The best strategy is to use Discord and Peacemaking on them, and attack from a distance with a yumi. | |
| − | + | ||
| + | '''Quest Item: [http://www.uoex.net/wiki/File:Radioactive_Material.png Radioactive Material]''' | ||
| + | |||
{| border="6" | {| border="6" | ||
| − | ! | + | !Toxic Experiment!!HP!!Phys Resist!!Fire Resist!!Cold Resist!!Poison Resist!!Energy Resist!!Quest Item!!Account Bound |
|- | |- | ||
| − | |[[File: | + | |[[File:Toxic Experiment.png]] |
| − | | | + | |402 HP |
| − | |align="center" "| | + | |align="center" "|68% |
| − | |align="center" "| | + | |align="center" "|55% |
| − | |align="center" "| | + | |align="center" "|60% |
| − | |align="center" "| | + | |align="center" "|57% |
| − | |align="center" "| | + | |align="center" "|57% |
| − | |align="center" "|[[File: | + | |align="center" "|[[File:Radioactive Material.png]] |
|align="center" "|Yes | |align="center" "|Yes | ||
| − | | | + | |} |
| + | |||
| + | === Izdajalska === | ||
| + | |||
| + | A very easy boss to defeat. Tanking or with pets. | ||
| + | '''Quest Item: [http://www.uoex.net/wiki/File:Vile_Venom.png Vile Venom]''' | ||
| − | |||
| − | |||
| − | |||
| − | |||
{| border="6" | {| border="6" | ||
| − | ! | + | !Izdajalska!!HP!!Phys Resist!!Fire Resist!!Cold Resist!!Poison Resist!!Energy Resist!!Quest Item!!Account Bound |
|- | |- | ||
|[[File:Izdajalska.png]] | |[[File:Izdajalska.png]] | ||
| Line 36: | Line 44: | ||
|align="center" "|[[File:Vile Venom.png]] | |align="center" "|[[File:Vile Venom.png]] | ||
|align="center" "|Yes | |align="center" "|Yes | ||
| − | | | + | |} |
| + | === Otrov the Widowmaker === | ||
| − | + | Pretty easy monster to defeat. Can tank it or use pets. Has lots of hp, but doesn't do a ton of damage to you. | |
| − | |||
| − | |||
| − | |||
| − | |||
| − | |||
| − | |||
| − | |||
| − | |||
| − | |||
| − | |||
| − | |||
| − | |||
| − | |||
| − | |||
| − | |||
| − | |||
| + | '''Quest Item: [http://www.uoex.net/wiki/File:Deadly_Fang.png Deadly Fang]''' | ||
| − | |||
| − | |||
| − | |||
| − | |||
{| border="6" | {| border="6" | ||
| − | ! | + | !Otrov the Widowmaker!!HP!!Phys Resist!!Fire Resist!!Cold Resist!!Poison Resist!!Energy Resist!!Quest Item!!Account Bound |
|- | |- | ||
|[[File:Otrov the Widowmaker.png]] | |[[File:Otrov the Widowmaker.png]] | ||
| Line 74: | Line 64: | ||
|align="center" "|[[File:Deadly Fang.png]] | |align="center" "|[[File:Deadly Fang.png]] | ||
|align="center" "|No | |align="center" "|No | ||
| + | |} | ||
| + | |||
| + | === Putrid Waste === | ||
| + | |||
| + | At the end of the dungeon. Extremely easy to kill. | ||
| + | |||
| + | '''Quest Item: [http://www.uoex.net/wiki/File:Smelly_Goo.png Smelly Goo]''' | ||
| + | |||
| + | {| border="6" | ||
| + | !Putrid Waste!!HP!!Phys Resist!!Fire Resist!!Cold Resist!!Poison Resist!!Energy Resist!!Quest Item!!Account Bound | ||
|- | |- | ||
| + | |[[File:Putrid Waste.png]] | ||
| + | |124 HP | ||
| + | |align="center" "|90% | ||
| + | |align="center" "|0 | ||
| + | |align="center" "|0 | ||
| + | |align="center" "|100% | ||
| + | |align="center" "|0 | ||
| + | |align="center" "|[[File:Smelly Goo.png]] | ||
| + | |align="center" "|Yes | ||
| + | |} | ||
| + | |||
| + | === Chief Paroxysmus === | ||
| + | |||
| + | Paroxy will do a few things | ||
| + | |||
| + | -One shot whatever he attacks with his Daemon Breath. | ||
| + | |||
| + | -Summon a bunch of random mobs (Ogre Lords, Savages, Orcs, Plague Beasts, Etc). | ||
| + | |||
| + | [[Imprisoned Pets]] required here. Put your pets on the boss, and as Paroxysmus summons mobs, kill them with a Yumi. As paroxysmus Kills a pet, be sure to ressurect and heal it up about halfway and resend onto the boss. Don't bother healing pets that are being hit, focus on getting the pet you just rezzed to Half HP or so. Takes a bit to get used to. A lot easier with 2 people. | ||
| + | |||
| + | '''Quest Item: [http://www.uoex.net/wiki/File:Acidproof_Rope.png Acid Proof Rope]''' | ||
| − | |||
| − | |||
| − | |||
| − | |||
{| border="6" | {| border="6" | ||
| − | ! | + | !Chief Paroxysmus!!HP!!Phys Resist!!Fire Resist!!Cold Resist!!Poison Resist!!Energy Resist!!Quest Item!!Account Bound |
|- | |- | ||
|[[File:Chief Paroxysmus.png]] | |[[File:Chief Paroxysmus.png]] | ||
| Line 93: | Line 111: | ||
|align="center" "|[[File:Acidproof Rope.png]] | |align="center" "|[[File:Acidproof Rope.png]] | ||
|align="center" "|Yes | |align="center" "|Yes | ||
| − | | | + | |} |
| + | [[Palace of Paroxysmus Gem Quest#Top | Return to Top]] | ||
| − | + | == Summoning Chief Paroxysmus == | |
| − | |||
| + | To summon Chief Paroxysmus you must obtain 8 items from Putrid Slimes and the Putrifier. | ||
| + | Those items are as Follows: | ||
| − | |||
| − | + | === Putrid Slime === | |
| + | Super easy. Basically slimes renamed. | ||
| − | + | '''Items Obtained:''' 7 of 8 Chief Paroxysmus Summoning Items | |
| − | |||
| − | |||
| − | |||
| − | |||
| − | |||
{| border="6" | {| border="6" | ||
| − | ! | + | !Putrid Slime!!Blackened Heart!!Rotting Head!!Dismembered Torso!!Severed Left Arm!!Severed Right Arm!!Severed Left leg!!Severed Right Leg |
|- | |- | ||
|[[File:Putrid Slime.png]] | |[[File:Putrid Slime.png]] | ||
| Line 125: | Line 140: | ||
|align="center" "|[[File:Severed Left Leg.png]] | |align="center" "|[[File:Severed Left Leg.png]] | ||
|align="center" "|[[File:Severed Right Leg.png]] | |align="center" "|[[File:Severed Right Leg.png]] | ||
| − | | | + | |} |
| + | |||
| + | === Putrifier === | ||
| + | Is basically a Balron with a bit more HP and Str. Tanking Is possible but putting [[Imprisoned Pets]] on this beast might be a better option. | ||
| + | '''Summoning Item: [http://www.uoex.net/wiki/File:Rabid_Brain.png Rabid Brain]''' | ||
| − | |||
| − | |||
| − | |||
| − | |||
{| border="6" | {| border="6" | ||
| − | ! | + | !Putrifier!!HP!!Phys Resist!!Fire Resist!!Cold Resist!!Poison Resist!!Energy Resist!!Summoning Item |
|- | |- | ||
|[[File:Putrifier.png]] | |[[File:Putrifier.png]] | ||
| Line 144: | Line 159: | ||
|align="center" "|47% | |align="center" "|47% | ||
|align="center" "|[[File:Rabid Brain.png]] | |align="center" "|[[File:Rabid Brain.png]] | ||
| − | | | + | |} |
| − | |||
| − | + | [[Palace of Paroxysmus Gem Quest#Top | Return to Top]] | |
== Feeding The Beast == | == Feeding The Beast == | ||
| Line 159: | Line 173: | ||
| − | The summoning altar looks like this | + | The summoning altar looks like this: |
[[File:Paroxysmus Summoning Altar.png]] | [[File:Paroxysmus Summoning Altar.png]] | ||
| + | |||
| + | [[Palace of Paroxysmus Gem Quest#Top | Return to Top]] | ||
| + | |||
| + | |||
| + | == Dungeon Map == | ||
| + | |||
| + | [[File:Palace of Paroxysmus Map.png]] | ||
| + | |||
| + | [[Palace of Paroxysmus Gem Quest#Top | Return to Top]] | ||
Latest revision as of 01:32, 6 April 2013
Contents
Quest Mobs and Items
This page shows the Palace of Paroxysmus Gem Quest Monsters and Items.
Toxic Experiment
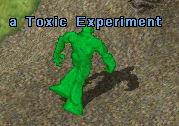
The Toxic Experiments spawn all over the dungeon. They hit pretty hard and can easily down a person and their pets. The best strategy is to use Discord and Peacemaking on them, and attack from a distance with a yumi.
Quest Item: Radioactive Material
| Toxic Experiment | HP | Phys Resist | Fire Resist | Cold Resist | Poison Resist | Energy Resist | Quest Item | Account Bound |
|---|---|---|---|---|---|---|---|---|
|
402 HP | 68% | 55% | 60% | 57% | 57% | Yes |
Izdajalska
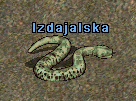
A very easy boss to defeat. Tanking or with pets.
Quest Item: Vile Venom
| Izdajalska | HP | Phys Resist | Fire Resist | Cold Resist | Poison Resist | Energy Resist | Quest Item | Account Bound |
|---|---|---|---|---|---|---|---|---|
|
13472 HP | 41% | 5% | 5% | 100% | 5% | Yes |
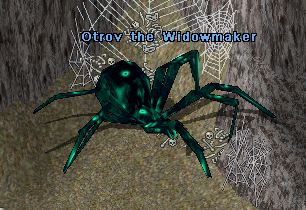
Otrov the Widowmaker
Pretty easy monster to defeat. Can tank it or use pets. Has lots of hp, but doesn't do a ton of damage to you.
Quest Item: Deadly Fang
| Otrov the Widowmaker | HP | Phys Resist | Fire Resist | Cold Resist | Poison Resist | Energy Resist | Quest Item | Account Bound |
|---|---|---|---|---|---|---|---|---|
|
12246 HP | 81% | 77% | 52% | 100% | 50% | No |
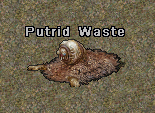
Putrid Waste
At the end of the dungeon. Extremely easy to kill.
Quest Item: Smelly Goo
| Putrid Waste | HP | Phys Resist | Fire Resist | Cold Resist | Poison Resist | Energy Resist | Quest Item | Account Bound |
|---|---|---|---|---|---|---|---|---|
|
124 HP | 90% | 0 | 0 | 100% | 0 | Yes |
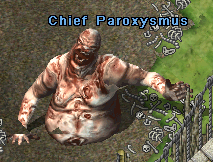
Chief Paroxysmus
Paroxy will do a few things
-One shot whatever he attacks with his Daemon Breath.
-Summon a bunch of random mobs (Ogre Lords, Savages, Orcs, Plague Beasts, Etc).
Imprisoned Pets required here. Put your pets on the boss, and as Paroxysmus summons mobs, kill them with a Yumi. As paroxysmus Kills a pet, be sure to ressurect and heal it up about halfway and resend onto the boss. Don't bother healing pets that are being hit, focus on getting the pet you just rezzed to Half HP or so. Takes a bit to get used to. A lot easier with 2 people.
Quest Item: Acid Proof Rope
| Chief Paroxysmus | HP | Phys Resist | Fire Resist | Cold Resist | Poison Resist | Energy Resist | Quest Item | Account Bound |
|---|---|---|---|---|---|---|---|---|
|
45828 HP | 20% | 81% | 80% | 77% | 71% | Yes |
Summoning Chief Paroxysmus
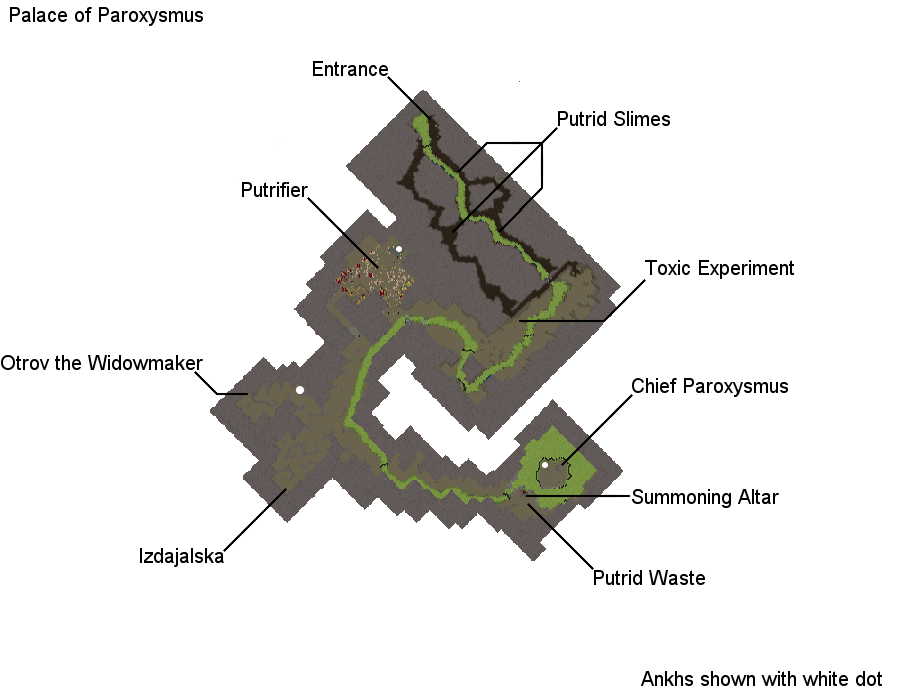
To summon Chief Paroxysmus you must obtain 8 items from Putrid Slimes and the Putrifier.
Those items are as Follows:
Putrid Slime
Super easy. Basically slimes renamed.
Items Obtained: 7 of 8 Chief Paroxysmus Summoning Items
| Putrid Slime | Blackened Heart | Rotting Head | Dismembered Torso | Severed Left Arm | Severed Right Arm | Severed Left leg | Severed Right Leg |
|---|---|---|---|---|---|---|---|

|
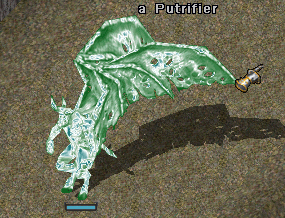
Putrifier
Is basically a Balron with a bit more HP and Str. Tanking Is possible but putting Imprisoned Pets on this beast might be a better option.
Summoning Item: Rabid Brain
| Putrifier | HP | Phys Resist | Fire Resist | Cold Resist | Poison Resist | Energy Resist | Summoning Item |
|---|---|---|---|---|---|---|---|
|
8769 HP | 79% | 79% | 59% | 100% | 47% |
Feeding The Beast
Once you have all the summoning items you are ready to engage battle with Chief Paroxysmus.
Work your way to the end of the dungeon and choose which Paroxysmus you would like to battle.
For the Extreme Paroxysmus (Currently Not Available) use the west box, for the normal Paroxysmus use the east box.
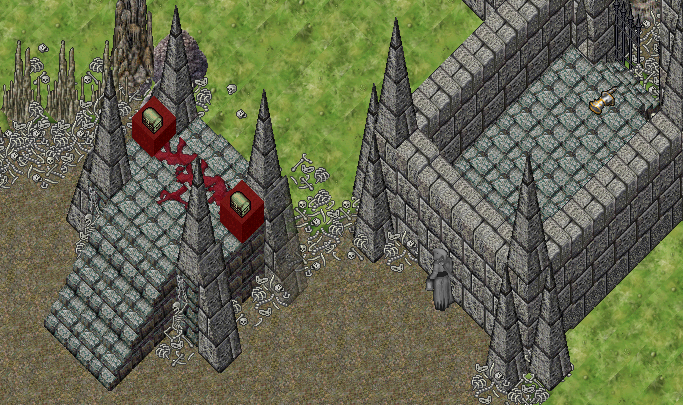
The summoning altar looks like this:
