Difference between revisions of "New Players Guide"
| Line 1: | Line 1: | ||
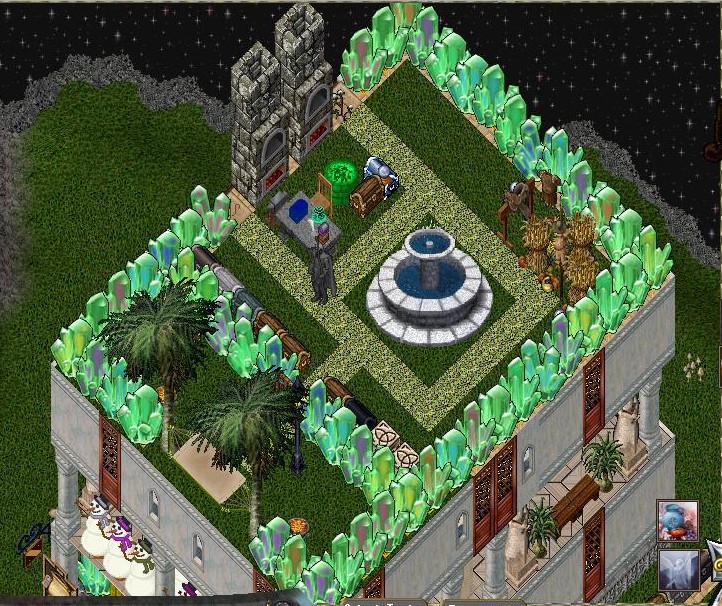
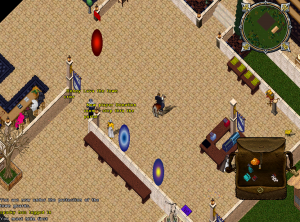
Thank you for reading this new player guide. You might find some things here you already know, but probably most of these are custom to our shard. Take a look at the [[FAQ]] as that may answer many questions you may have. The [[Survival Guide]] is something else you should check out, it has quite a few very good tips. '''Make sure you read the rules in our [http://www.uoex.net/codex codex] before you get started'''. There's also a ton of information written on our [http://www.uoex.net/forum forum], as well as important shard news and general chit chat - come join us! [[File:cygnus.jpg|thumb|800 px|The beautiful home of Llexa.]] | Thank you for reading this new player guide. You might find some things here you already know, but probably most of these are custom to our shard. Take a look at the [[FAQ]] as that may answer many questions you may have. The [[Survival Guide]] is something else you should check out, it has quite a few very good tips. '''Make sure you read the rules in our [http://www.uoex.net/codex codex] before you get started'''. There's also a ton of information written on our [http://www.uoex.net/forum forum], as well as important shard news and general chit chat - come join us! [[File:cygnus.jpg|thumb|800 px|The beautiful home of Llexa.]] | ||
| − | [[File:ex.jpg]] | + | |
| − | + | = Shard Specifications = [[File:ex.jpg]] | |
== Account Info== | == Account Info== | ||
You may have 5 characters on this shard. There is no skill cap. Only one account is allowed per person. | You may have 5 characters on this shard. There is no skill cap. Only one account is allowed per person. | ||
Revision as of 03:17, 21 June 2013
Thank you for reading this new player guide. You might find some things here you already know, but probably most of these are custom to our shard. Take a look at the FAQ as that may answer many questions you may have. The Survival Guide is something else you should check out, it has quite a few very good tips. Make sure you read the rules in our codex before you get started. There's also a ton of information written on our forum, as well as important shard news and general chit chat - come join us!Contents
- 1 Account Info
- 2 Player Vs. Player (PvP)
- 3 Felucca
- 4 Commands
- 5 Tokens and Excelsior Dollars
- 6 Excelsior Exchange
- 7 Client Assistants
- 8 Character Building
- 9 Your New Character
- 10 *Beginning Adventures*
- 11 *Seeking the Anti-Virtues*
- 12 Advice
- 13 Addendum I - Critical Skills & Abilities
- 14 Addendum II - Crafting
- 15 Addendum III - Macroing (Legally)
Account Info
You may have 5 characters on this shard. There is no skill cap. Only one account is allowed per person.
Player Vs. Player (PvP)
Excelsior is a No-PK (player killing) shard, and PvP is only possible in two locations: The PvP Dungeon and the PvP Arena Thunderdome PvP (See for more details). The Dungeon is accessible from Britain in Trammel, and the Arena is accessible from within the Dungeon. You may also PvP with guildmates in the privacy of your own homes, but doing so in public or in town is not appreciated.
Warning: These PvP areas are free-for-all, and you can be attacked at any time.
Felucca
Felucca on Excelsior is different from the regular OSI shards. Some areas can be frustrating and result in death for newer or inexperienced players. There are very few resurrection points. Tread carefully, and make sure you're well prepared.
1. Felucca is under the same rules as Trammel, and players cannot be attacked by other players there.
2. You cannot mark any runes, and you cannot recall out of dungeons or T2A Lost Lands areas.
3. There are Custom Creatures, both good and evil.
4. Using the Recall spell to leave Felucca will leave you drained of all your mana for a period of time.
5. You may not log in with another character if you log out in Felucca. you must log back in on that character before you can log in with another character.
Commands
There are various tools and shortcuts available to you on Excelsior that you can access through keyboard commands. Included in this guide are some of the most essential commands:[cs: You can macro any spell with [cs {spellnamenospaces}.
[exex: Custom system used to trade items/stackables. This will be discussed in greater detail later.
[help - Lists the commands in game
[c <insert text> - To chat in Global Chat. This will allow you to communicate with all other players. Click here for a web log of the global chat.
[chatoptions - To open the Chat Options Menu
[g - To open your Guild Menu
[g <insert text> - To chat in guild
/ <insert text> - To chat in party
[pm - To open your PM inbox
[pm <persons name> - To send a private message
[claim: Will auto loot some items from a corpse, including Gold, Ointments, Fertile Dirt, Arrows and a small reward for claiming
[claimall: Will auto loot all items from a corpse.
- NOTE ON CLAIMING: This is both incredibly useful and helpful to the server. It gets rid of cluttered remains, and lets you remote loot. Be careful, though - if you are playing in a group, or there are others adventuring near you who help you in a fight, don't be greedy. Share the wealth, spread the love, and don't [claim everyone's stuff for yourself. Also, don't [claim Champ spawns or you won't get the gold. You have been warned.
THIS IS A VERY BRIEF LIST. Pet Commands, House Commands, Phrases you need to know - Check the dedicated section of the wiki for lots of important information.
Tokens and Excelsior Dollars
Tokens: You get tokens by recycling items and corpses and killing monsters - the harder the monster, the more tokens it will give. They are turquoise in color and resemble coins or checks. To receive tokens from kills, your token ledger MUST BE in your backpack. You can also get tokens by trashing items. But do not put tokens, token checks, or your token ledger in your TrashForTokens backpack. You cannot get more tokens by trashing tokens. You can spend your tokens on special items and deeds that can be purchased at the Token Stone in Trinsic.
Excelsior Dollars (ED's): You can primarily get them with a donation, though you can also get them in events and by buying them from fellow players. You can use them for donation rewards, and there are also certain player services that require an amount of ED. These look like white scrolls. If you hover your mouse over them, it should display " : Genuine : "
Excelsior Exchange
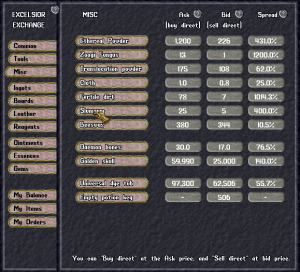
This is an in-game method of resource sale and purchase throughout the shard. It is simple to use and incredibly useful.
Client Assistants
There are a number of incredibly useful applications that are approved for use on Excelsior. These tools can assist you in a number of ways, but always be aware of the codex rules governing different types of unattended macroing. Failure to do so will not be pleasant for your experience, and we want everyone to have a good time (within the rules).
UO Auto Map
This excellent tool will help you get around, giving you a full map and personal location whether you're in Britannia, a dungeon, or lost at sea. It will also show you important locations. It is invaluable, especially when you make it to Felucca. Be sure to check the link for installation instructions.
Razor
This is another invaluable tool, and its versatility is hard to describe in few words. It will keep track of your skills, allow you to set hot keys and macros, dress and undress weapons and armor quickly, organize bags, sell items - the list goes on. It can seem a little daunting at first for players unfamiliar with it, but everything is easier for having it. Be sure to check the installation notes because you must install it in a specific way in order for it to work with Excelsior.
EasyUO
Another excellent assistant that works differently from Razor. Its strength is that user-submitted scripts can make your life so much easier. Not all of them are perfect, and many are not oriented to free shards, but you'll see it referenced at other places in this wiki and the forums and that's because it's a very nice tool to have. You must register on their website, but the forums are where you can find some excellent user-submitted scripts such as CyberPope's Lumberjacking and Mining Radars. Check the Excelsior forums for further discussion.
TeamSpeak
This application allows you to voice chat with other players, and Excelsior has its own custom channel! Chat with the whole shard, or keep it to your guild/party, whatever suits you.
Character Building
A few tips for before you log in, when you're trying to decide what kind of character to make.Stat and Skill Caps
The stat cap for every character is is 300, and can be raised to 350 total with scrolls from the Harrower. The maximum you can have in a single stat is 125, but that can be raised by special scrolls as well. See here for more details on Stats. You begin with a 100.0 cap on individual skills, and higher individual caps (up to 120 with powerscrolls, and 130 with essences for FIGHTING SKILLS ONLY) are available through adventuring or barter. There is no limit on how many skills you can raise.
Professions
Because there is no total skill cap, every character could eventually become the figurative Renaissance Man (or Woman), rivaling Leonardi Da Vinci himself in knowledge and versatility. That being said, in order to be a successful craftsperson it's important to know that crafting and harvesting tools, with the exception of the tinker's tool kit, are not readily available from NPC vendors. If you have plans of being a legendary craftsman of any type, plan to devote some time to at least one character who has Mining and Tinkering so that you can replenish the tools necessary to craft. Failure to account for the lack of tools readily available will leave you unable to sustain yourself with ingots or logs.
Stat distribution
Strength: In addition to the amount of weight you can carry, and the requirement for equipping armor and weapons, strength also determines your character's Hit Points. The number of HP you will have can be calculated by dividing your strength in half and adding 50. You can also equip items to raise your strength or HP. Please note that raising your HP alone does not affect your strength.
Dexterity: Dexterity determines the amount of stamina your character has. Stamina relates to your attack speed, how quickly you are able to perform certain actions, and how quickly you will heal naturally, among other things. Your stamina will be equal to your dexterity, unless you have an item equipped that boosts it.
Intelligence: Intelligence determines how much mana you will have to cast spells, your spell damage, and your ability to cast certain spells. Raising your intelligence will boost your mana, and you can equip items to raise your intelligence or MP. Please note that raising your MP alone will not affect your intelligence.
Unlike many shards, stat gain in Excelsior occurs roughly once every 15 minutes, assuming you are using a skill. The stat raised is determined by the skill used. Because of this, you may want to set your stat distribution more evenly when creating a character. Placing all of your stat points into one stat may leave you struggling for a longer period of time than necessary to create a viable character build. See Stats Guide to figure out which skills you may want to work on to raise particular stats.
Skill Raising
Most non-harvesting skills are allowed to be trained through unattended macroing, as long as you find an out-of-the-way spot to do it, so when choosing skills keep in mind what will require the most effort to raise. Choosing 'Hiding' instead of 'Magery' may be the most obvious wrong choice, but through a bit of careful planning you can get a good jump-start on your character build while leaving the easy skills to be trained in an automated or passive fashion. Further information and recommendations on skills can be found in Addendum I - Critical Skills and Abilities.
An excellent template for raising each of your skills may be found here.
Trainers
Skill trainers can be found throughout Britannia, and will generally train their relevant skills up to around 30 for .1 skill per gold (~300 gold). Some trainers are everywhere, while others (such as thief trainers) are more scarce. Either way, you'll find the price excellent and the trainers easy enough to find, so don't fail to take advantage of these (and keep them in mind when building your character). When you join the shard, you receive 5 free skill raises using any trainer. These apply to your account, not to your character, so keep that in mind, although you should quickly be able to render any concern over the cost irrelevant.
A list of skills and their corresponding trainers may be found here.
Skill Ball + 60
After you've made your character, you will have one +60 skill ball to work with. While it may seem like a good idea to use it as soon as you begin, if possible resist the temptation. Likely you'll choose something that will help you immediately, rather than something that will help you in the long term. If you wait until you get a 120 skill cap powerscroll, you can reach the true cap of an important skill with a lot less hassle - say, taking carpentry from 60 to 120, rather than taking a lesser skill from 0-60 or from 40-100. You must weigh the benefits of using it or saving it, but proper planning (and patience) when creating your character will allow you to take advantage of the greatest potential gain from this item. Each character receives one, and it is usable only by that character.
Your New Character
Young Player Status
When you first start playing, monsters in the field will not attack you unless you attack them first, though if you wander into a dungeon you're fair game. Because of this, you may wish to explore the shard to discover where dangerous areas are, so that you may either avoid them until you are stronger, or try your luck with one monster while others ignore you. Since you will start out with a mount, you will be able to move quickly around the shard. Just remember, if you have a pet commanded to guard you, it may choose to attack creatures and be killed. If at any time you get lost, you will be able to teleport immediately to Haven as long as you have Young status. To do this, open your Paperdoll and click the Help button. Click the arrow next to "Young Player Haven Transport" at the top to be teleported.
Your young status will remain until you have met any of the following criteria:
- Your account is more than 14 days old,
- You have played for more than 40 hours,
- You reach 1000 total skill,
- You renounce your status by saying "I renounce my young player status"
You will also have access to the Newbie Dungeon, which is available until your account has been active for 21 days. It is discussed in greater detail elsewhere.
Your Inventory
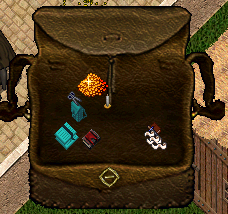
Every character will start with the normal staples for their chosen skills in their inventory. You will also find a blue backpack and blue ledger. The ledger is to keep track of your tokens, while the bag is a trash can that will reward you with tokens for using it. Tokens will be discussed in greater detail later, but basically they're a reward for throwing stuff away, killing monsters, and [claiming dead bodies. In your bank you will find a pet bonding deed and your Skill Ball + 60. The pet bonding deed will also be discussed in greater detail later. Your first character will have a check for 10k gold in your bank. If your account is new, you'll also have a helm that will give you a 30% Lower Reagent Count (LRC) bonus while your young player status remains.
Starting point
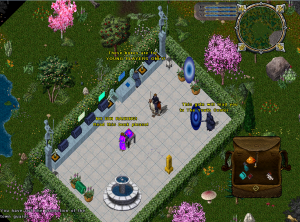
When you first log in with your new character, you'll be standing in the Excelsior Town Center. To the west is a red portal; This is your teleporter to every major location, and you'd do well to familiarize yourself with its contents. But first, look to the south of your character - that blue portal leads to the New Player Donation Room. So head through that portal, and search the containers to the west. Find some good stuff, but make sure to take only what you need. Veteran players take the time to replenish and organize it, so please show appreciation for their efforts. Depending on your luck or timing, you can find some truly great loot. If you happen to find a pet, be sure to read the Animal Taming section of this guide or the dedicated section of the wiki on animal taming before you unshrink it. When you've finished gearing up, run back through the Town Center portal that you came from. Skip the other portal for now. When you're back in the Town Center, run over to the red Exteleporter portal. Your menu immediately shows you Trammel and its cities, including the Town Center at the top. Take a glance at it but the Teleporter destinations will be discussed in greater detail later. For now, head to Britain.When you arrive, you'll notice that the red portal you went through is now a red shield on the ground. You will find these at each of your destinations, and they are the same as the portal in the Town Center. As you look around, you'll see two important objects immediately:
*Light Blue Box: [Exex Box - This is where you'll place items that you want to go onto the Excelsior Exchange, discussed later.
* Yellow Stone: Voting Pillar - Two Convenient links to the UO Free Shard rating boards. Please take the time to vote as often as you can - we always want more people to join our shard, and if they see a thriving community they're more likely to check it out!
Run west past the bank until you come to the ankh and multi-colored pillars. Note each of their functions:
* Red Stone: Pet Resurection Stone - Resurrect your bonded pet. Only a bonded pet can be resurrected, and you must have its ghost with you.
* Blue Stone: Pet Summoning Stone - If you lost your pet or its ghost, and simply cannot reunite, this stone will retrieve it for you at a high cost (60k gold).
* Grey Stone: Corpse Retrieval Stone - The contents of your last corpse will be retrieved (but only your last one)at a moderate cost (20k gold). If you have died more than once since you last retrieved your items, you must manually retrieve your items from that corpse and this service will not retrieve them.
* Green Stone: Bank Stone - Redundant at this location, but this item is available for your house eventually. Ponder the possibilities.
* Ankh - You can resurrect yourself and tithe gold for Chivalry and Cleric spells. You can also lock/unlock your karma. When your karma is locked, you can no longer gain positive karma, but you can still lose karma.
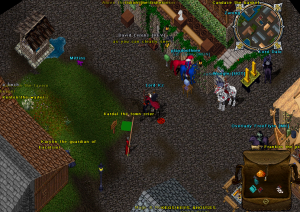
Head back to the Exteleporter and go to Trinsic. Take a look around, noting the boxes we already discussed, as well as the new objects:
* Red Stone - Reagent Vending Machine - sells bulk quantities of reagents for magery, necromancy and druid spells.
* Gold Stone - Vendor Stone - sells the more expensive/custom items you can purchase with gold. It also sells the Trash-4-tokens bag, and the Token ledger should you misplace or lose your original.
* Turquoise Stone - Token Stone - sells rewards which you can buy with tokens. Tokens are gathered by killing monsters, and turning in Bulk Order Deeds. You can also get them by trashing items using your Trash-4-Tokens Bag. Keep your token ledger in your top-level backpack, or in a blessed item bag (which is purchasable with tokens from this stone) at all times, so you can receive tokens.
* White Portal: Excelsior Dollar Reward Gate - This gate leads to the 'Excelsior Dollar Reward Stones', which sell special items that you can purchase with Excelsior Dollars (discussed later).
* Blue Stone: UO Excelsior Websites - Opens a list of Excelsior's website, wiki, forum, etc.
*Blue Stones on tables: Raffle Stones - Raffle Tickets for varying lengths of time and winnings.
Now that your character is alive and oriented, take a moment to fine-tune your options and hotkeys, if you know what you want. If not, or you already have, or you don't even know what I'm talking about, then please, continue on!
*Beginning Adventures*
There are a lot of open-ended possibilities at this point, and depending on your play-style and interests you can go in a lot of different directions. Generally speaking, though, you want to train and make some gold, which this section deals with. It also explains some of the basic and viable strategies available to you for progression and, ultimately, combat-readiness and home ownership. Crafting will not be emphasized in this section BUT, I suggest you have (or know) a good tinker and you can find it discussed later. You could very well call this section "Macro and Kill Rats" but luckily there's a little more to it.
Training Room
- Available from the Exteleporter by click Custom -> Training Room
In this room you'll find a number of invincible monks who do no damage to you. In the southeast corner there are tables with special green daggers that each count for a particular weapon type and give a bonus to hit. If you wish to raise lumberjacking at the same time as swordsmanship, simply equip an axe weapon while you train instead of the swordsmanship green dagger. Also, though you receive no damage, if you are wearing armor it will suffer durability effects so be sure to unequip it while training.
You can train your skills up to 75 skill points here, and are allowed to train while AFK. Your pets may also train here, but may not be left unattended. Leaving pets unattended can result in a simple warning or the loss of said pet permanently. Pets may become wild and attack other players; while they can't hurt anyone in the training room, it is still considered a nuisance, and therefore they are not allowed to be trained unattended, period.
Some other skills are able to be trained while you fight, though not all skills are allowed at this location.
Newbie Dungeon
As long as your account is younger than 21 days, you'll be able to access the Newbie Dungeon from the yellow portal in the Training Room. When you enter the dungeon, to your north is a group of vendors and past them are mobs that won't attack you, even if you attack them. You'll find the same to the east, past the resurrection stones. If you follow these paths to the next area you will find other creatures of lower and lower-mid tier, who will attack on sight but should be manageable provided you're prepared and have any half-decent loot from the Donation Room. To the south of your initial entry portal is a critical area for new players because it is the location of...
The Newbie Rat Quest
This quest is incredibly simple and it is available to you as long as your account is younger than 21 days. It is repeatable every 30 minutes and will be the early-game source of almost all of your wealth. Talk to Joe the Apprentice, tell him you'll help him with his rat infestation, and kill however many rats it tells you to. You'll want to run east from him; the rats to the south of him are easier, but they won't yield quest results. Be sure to loot the rats as well, particularly easily with [claimall. When you turn the quest in to Joe, he'll reward you with a bag of 1-2k gold and 60-120 'organic material.' You may also have received a few of these from the rats you killed. 'Organic material' is a late-game item that many veteran players will find useful, and therefore you can easily sell it through global chat or through the [Exex, discussed later. Return here as often as you can before you are no longer able to; this will get you 5-10k gold every time, and even on your 20th day when you're a 25x grand master with a gaggle of custom pets, "godmode" equipment, or your very own custom-built 3-story keep, it'll still be easy and profitable.
Item Insurance
At the point where you have any items at all worth caring about, and you've collected any meager sum of gold whatsoever, you should insure whatever items you deem important. It's not difficult,and whatever fool notion gets into your mind won't have to cost you your spellcaster's key ring or your Crossbow of Vanquishing... or whatever you call it now.
Player Vendors
Player Vendors are available at many of the major locations such as Britain, Trinsic, the Town Center, and at specific locations available to you through the Exteleporter. They often contain incredibly useful items, and even if you can't afford them yet, take a look to familiarize yourself with what you have in store.
*Seeking the Anti-Virtues*
So, you're ready for the real adventures, eh? Well, this section is not completed yet so you'll find no help here. Sorry to get your hopes up. I'm sure you'll find it somewhere else though.
Advice
1. Remember the names of the people you talk to about important things. For example, staff members or other players that are causing problems.
2. Remember the exact date/time Type [time to get the exact server time. This way we can find what was going on very easily.
3. Take screenshots There are things that cannot be logged or described with words... if you feel like taking a screenshot, do it. It might also be good laughing material. :) To take a screenshot, hit Prt Scrn (Print Screen) on your keyboard. Then paste it into any image editing program, like Paint.
4. If you die and believe you were PK'd, contact a staff member On 18th May 2006 we implemented a system that logs certain ways of player killing, that can be done even in Trammel rules. Just don't get yourself killed again until a staff member investigates and takes notes on the matter.
5. Insure your items, bond your pets You never know when you might get disconnected in game, or when the server might be disconnected... Many unpleasant things can happen st random times, so it is advised that you insure your valuable items and bond pets that are precious to you. Staff will try to restore as much as they can if there is a server problem, but are not held responsible for items you lose on your own. DO note: Events can be lag filled, and there may be several corpses stacked on top of yours at any time during a battle. The corpse stone can only do so much, and multiple deaths during an event can lead to lose of uninsured items.
Addendum I - Critical Skills & Abilities
This section will be fully implemented later!
Animal Taming
Echees
These squirrel-like creatures don't take any pet slots, but you can only have one of them - if you have two they will kill each other instantly. If it is alive and the owner is alive, it heals the owner (echees cannot resurrect players), depending on how experienced the owner is (based on Points). Points = str*5 + dex*5 + int*5 + total skills*10 . It will heal only if you have under 3000 skill points, and the less points you have, the more it will heal and even restore your mana. The restoration will not happen instantly, but will cause your health to increase quicker. Echees are non-breedable, and already come as lvl 40 with a set of ability points you can distribute.
Chivalry / Necromancy
Cleric Spells
These are incredibly powerful to have and practically essential for mid- and late-game play. The rely on your Spirit Speak skill and tithing gold. Read here for more information.
Addendum II - Crafting
This section will be implemented later!
Addendum III - Macroing (Legally)
This section will be implemented later!
